Tutorials
Short walkthroughs for your first hour on TicketHappy: eight for the person setting it up, six for the people working the tickets. The guide has the long version of everything here.
Each one ends with a picture of the screen it describes, from a demo organization; videos are on their way.
For owners
You'll need the owner or administrator role. The Setup tab on the right of every page walks through the same steps and ticks them off as you go.
1. Invite your people
About two minutes per person. Agents and managers take a seat on your plan; requesters are free and never need one.
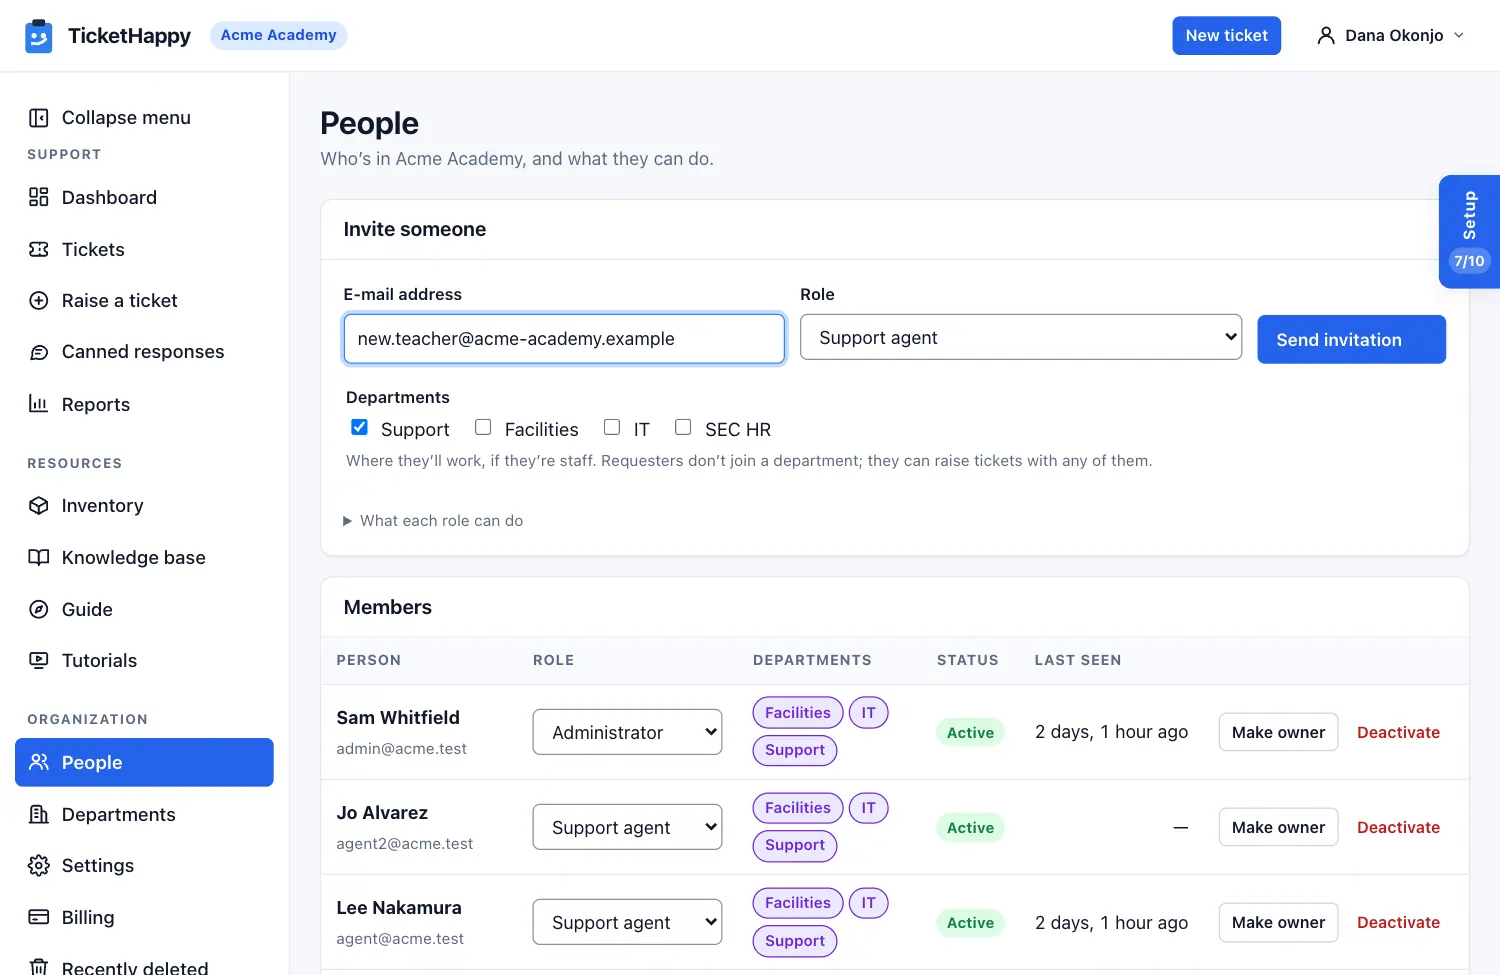
- Open Organization → People in the menu on the left.
- Under Invite someone, type their e-mail address.
- Choose a role: Support agent for someone who works tickets, Manager to see and assign every ticket in their departments, Administrator to run settings and people too, Requester for everyone else.
- For staff, tick the departments they'll work in.
- Click Send invitation. They get an e-mail with a link that works once, for that address, for 7 days. Outstanding invitations are listed below, where you can revoke one.
2. Set up departments
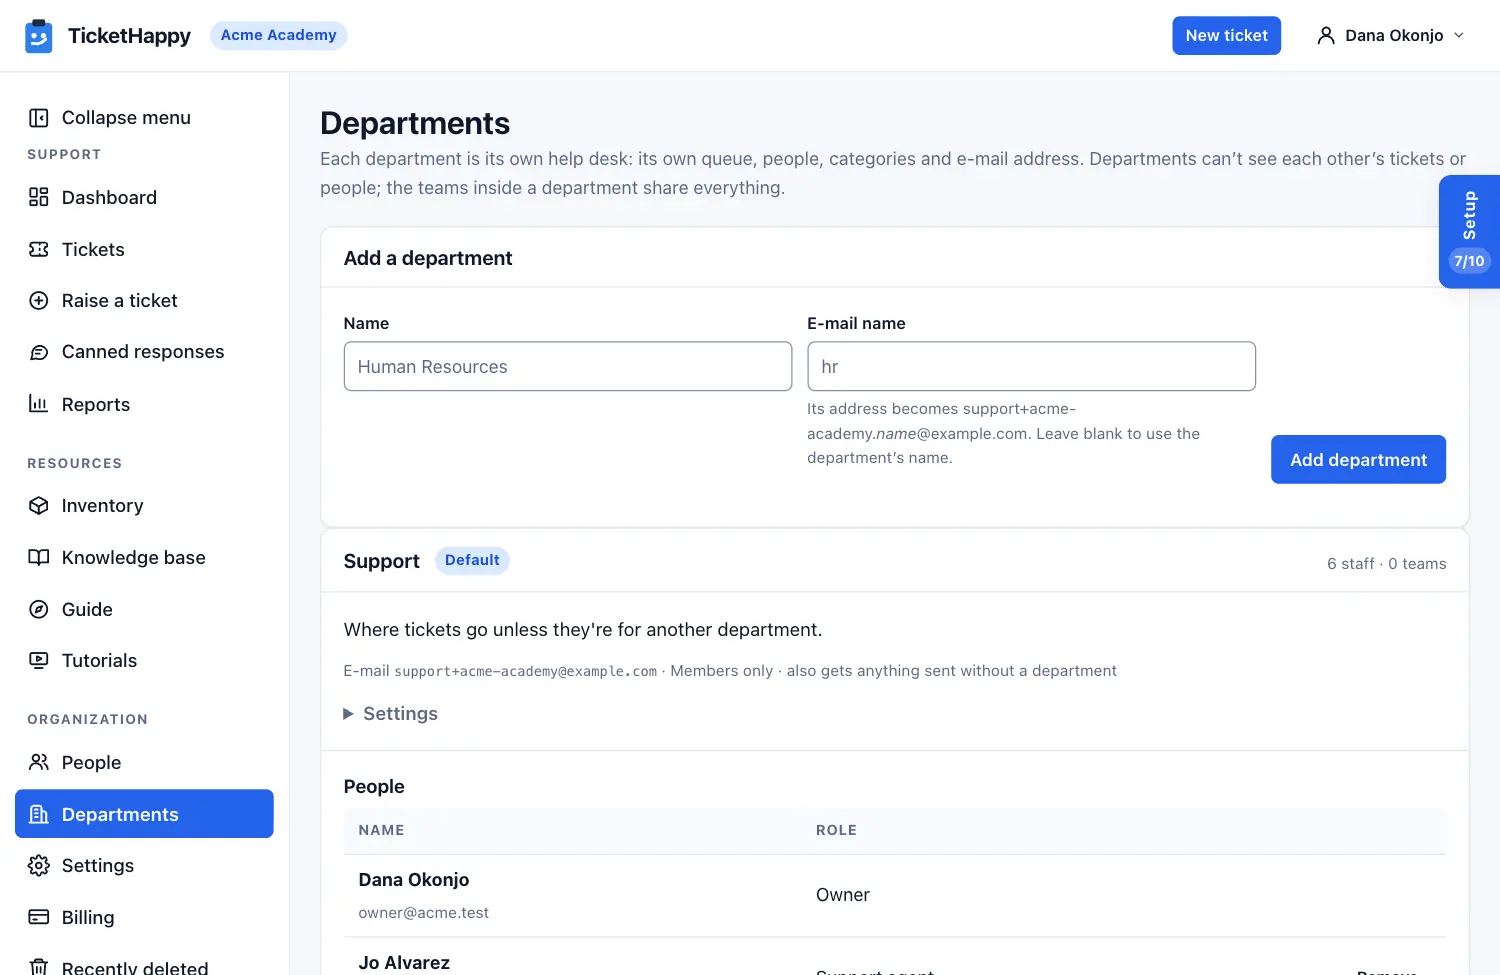
Each department is its own help desk: its own queue, people, categories and e-mail address. Departments can't see each other's tickets. You get one to start with; add one for each team that answers its own requests, such as Facilities or HR.
- Open Organization → Departments.
- Under Add a department, enter a name and, if you like, a short e-mail name such
as
hr; it becomes part of the department's address. - Click Add department.
- Open the new department's Settings to choose whether it takes tickets by e-mail and who may e-mail it. For HR, tick Confidential so its tickets stay hidden even from you.
- Add people to it from its People list, or pick it when you invite them.
3. Set service levels
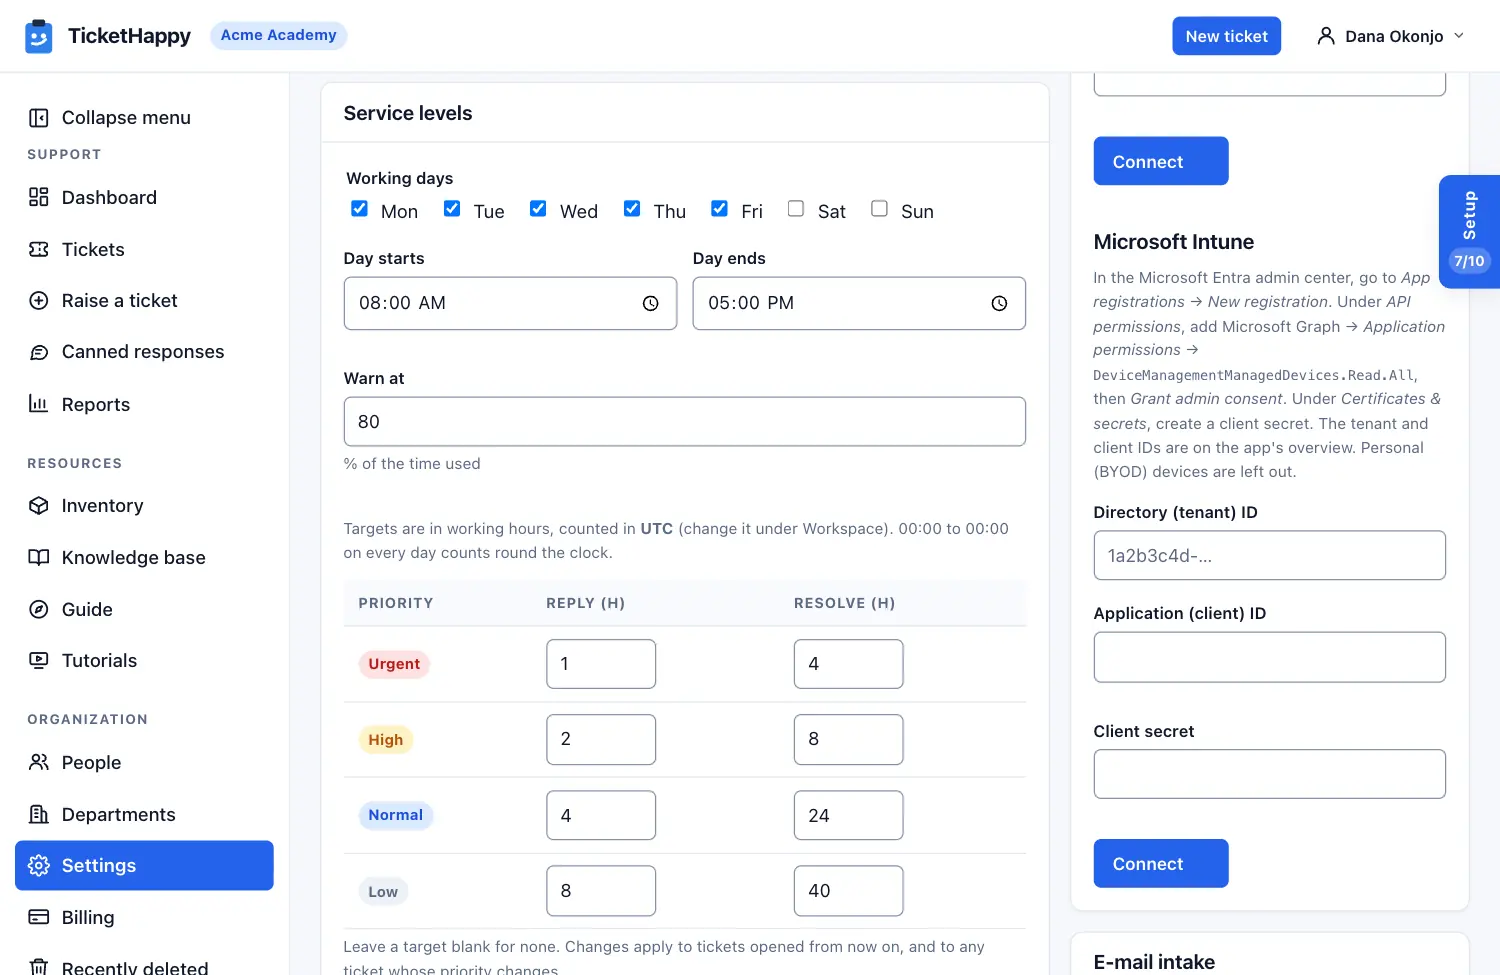
A service level is a promise: how quickly someone replies, and how quickly the problem is fixed, by priority. The clock runs only during your working hours.
- Open Organization → Settings and find Service levels.
- Set your working days and hours.
- For each priority, enter the working hours you aim to take for the first reply and for resolving the ticket. Leave a box blank to set no target for it.
- Save. From now on tickets show countdown badges such as Reply due in 40 minutes, the assignee is e-mailed when a target is close, and the dashboard and reports show how often targets were met.
4. Take tickets by e-mail
People are used to e-mailing an address such as [email protected]. Keep it, and have it send a copy of everything to TicketHappy; each e-mail becomes a ticket and replies follow the thread.
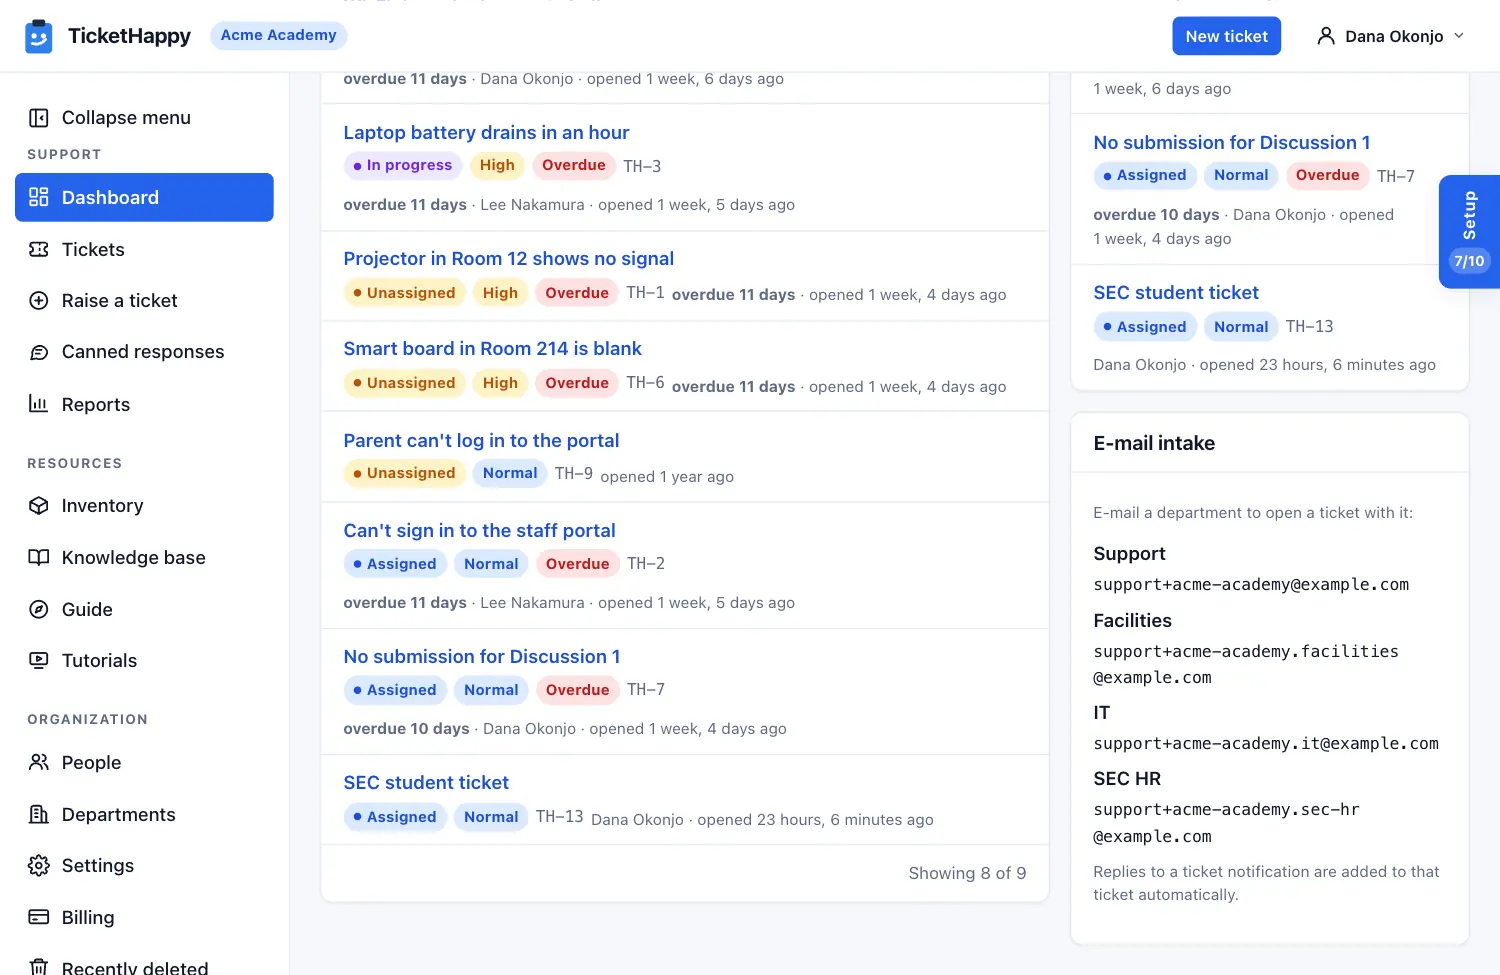
- Find your department's TicketHappy address on the Dashboard under E-mail intake (or on the Departments page).
- In Google Workspace, open Google Groups, create or open the group with your support address, let people outside your organization post to it, and add the TicketHappy address as a member. In Microsoft 365, set up forwarding on the shared mailbox to the same address.
- Send a test e-mail to your support address. Within a few minutes it appears as a ticket under Tickets; the Setup tab ticks this step for you.
- Back under the department's Settings, choose who may e-mail in new tickets: members only, or anyone.
5. Connect Google or Microsoft sign-in
Sign in with Google and Sign in with Microsoft are on the sign-in page for everyone already. These steps let your people join by themselves and, if you want, require that sign-in.
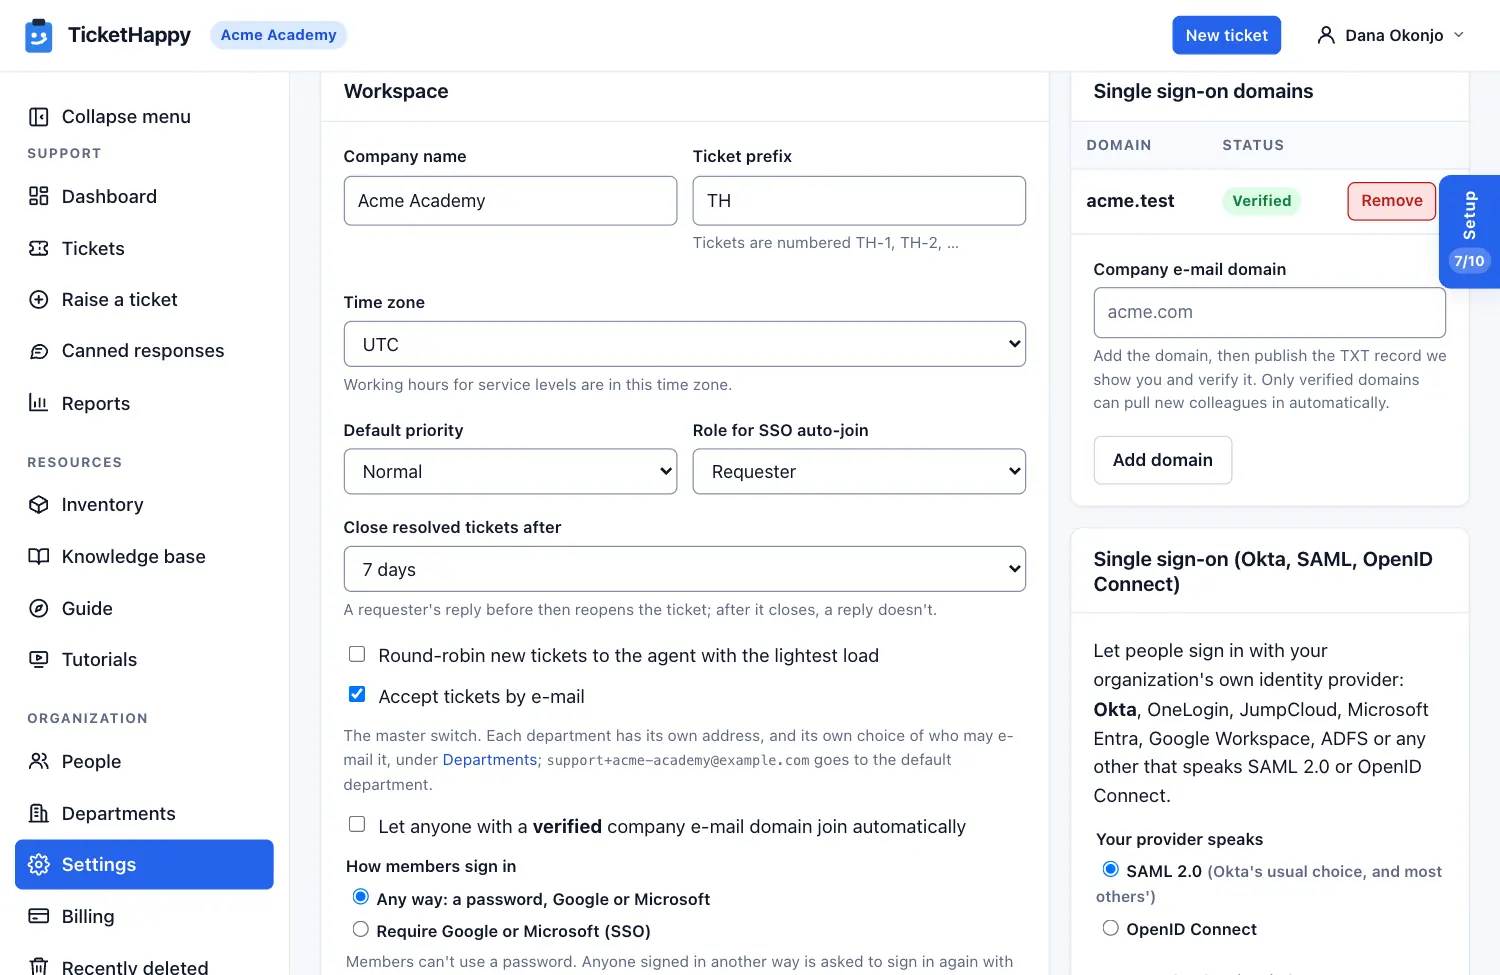
- Open Organization → Settings and find Single sign-on domains.
- Enter your organization's e-mail domain, such as
yourdomain.org, and click Add domain. - Add the TXT record it shows you to your domain's DNS, then click Verify.
- Tick Let anyone with a verified company e-mail domain join automatically. Anyone who signs in with Google or Microsoft using that domain now joins as a requester (change the role under Role for SSO auto-join).
- Optional: under How members sign in, choose Require Google or Microsoft (SSO). Set up two-step sign-in on your own account first: your password stays as the way back in.
6. Give a category its own targets
Service levels are set by priority. Some kinds of request deserve their own promise whatever their priority: a password reset should be answered in half an hour, a new laptop can take a week. A category's own targets replace the priority's for its tickets.
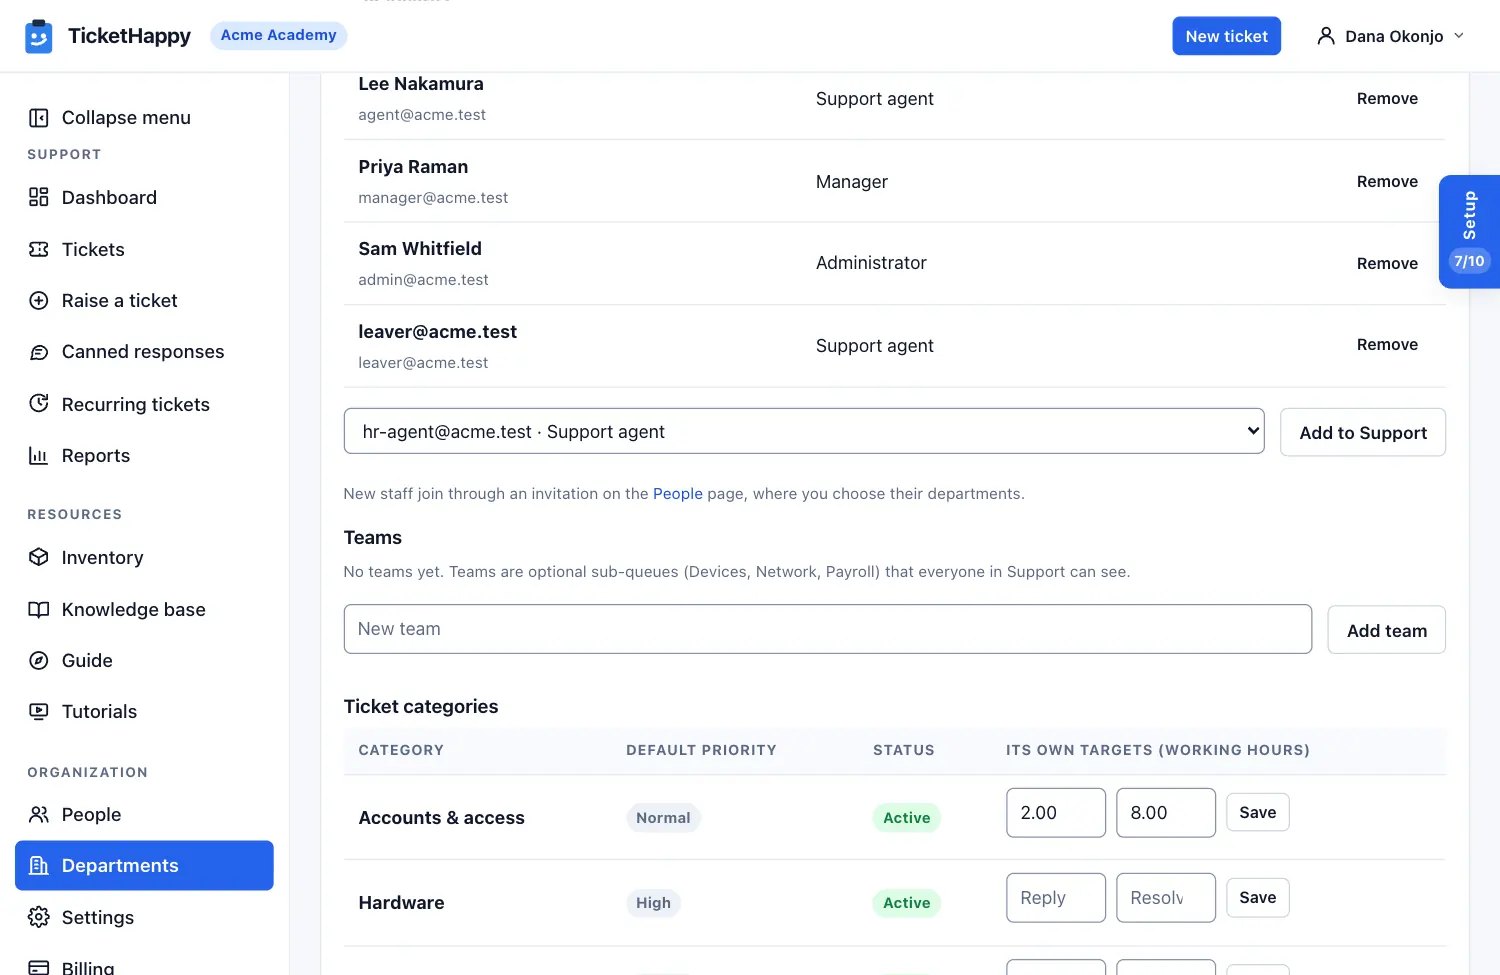
- Open Organization → Departments and scroll to the department's Ticket categories.
- In the Its own targets column, type the working hours to the first reply and
to resolution, such as
0.5and2for password resets. - Click Save on that row. Leave both boxes blank to go back to the priority's targets.
- From now on tickets raised in that category, or moved into it, get those deadlines; tickets already open keep theirs. The Service levels card lists every category with its own targets.
7. Open tickets on a schedule
Some work comes round by itself: test the fire alarm every month, check the backups every Monday. A recurring ticket opens a fresh ticket on its days, so nobody has to remember. Department managers, administrators and the owner set them up.
- Open Recurring tickets in the menu on the left.
- Under New schedule, write the subject and details of the ticket to open. Put
{date},{month}or{year}in the subject and the day's date is filled in: “Fire alarm test, {month}”. - Choose the department, and if you like a category, priority and assignee.
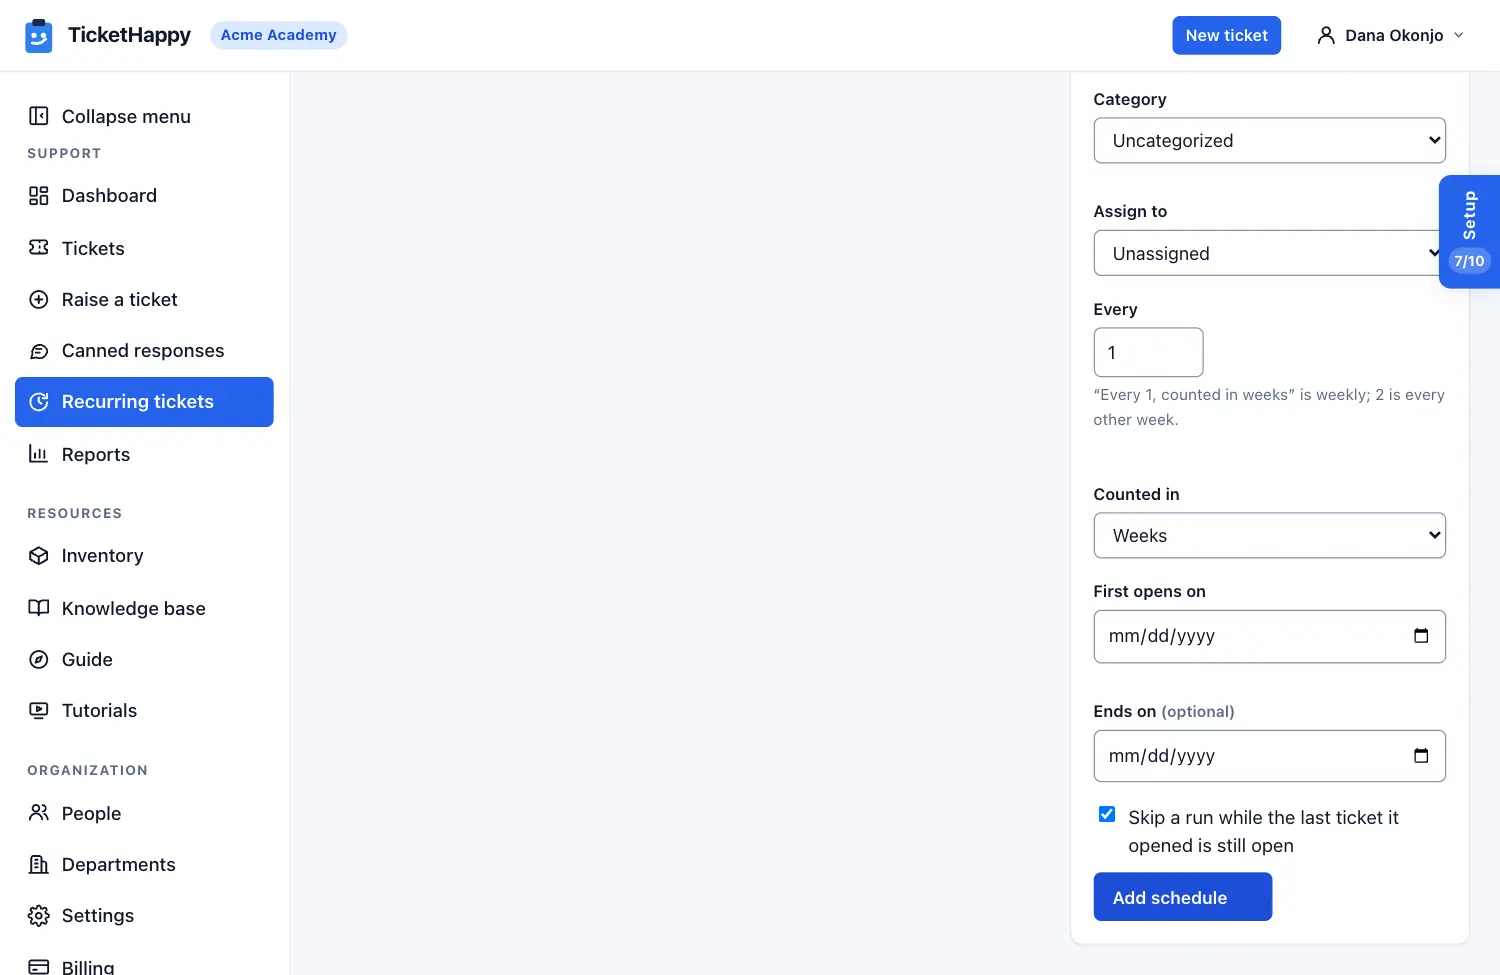
- Set how often: every 1 counted in weeks is weekly, every 2 is every other week, every 1 counted in months keeps its day of the month. Pick the first day it opens, and an end date if it should stop.
- Leave Skip a run while the last ticket it opened is still open ticked unless you want a new ticket every time, then click Add schedule. Tickets open overnight on their day, from you as the requester, with the usual e-mails.
8. Take tickets from Slack
If your organization lives in Slack, people can raise a ticket without leaving it. TicketHappy sees who's asking and their e-mail address, nothing in your channels, and only members of your organization can raise tickets this way.
- Open Organization → Settings and find the Slack card. It appears once TicketHappy has switched the Slack app on for everyone; until then there's nothing to set up.
- Click Add to Slack and approve it in Slack. One Slack workspace connects to one organization.
- Tell your people: type
/ticketfollowed by what's wrong in any channel, or choose Create TicketHappy ticket from a message's menu. A short form asks for the department and priority, and the ticket is raised as them, with the usual e-mails. - To stop, click Disconnect Slack on the same card.
For agents
For support agents and managers. Your departments' tickets are under Tickets; the Dashboard shows what needs attention first.
Anything that can't be undone, such as deleting a ticket, asks first in a
small dialog on the page. Esc cancels it, and also closes the filters panel and
the list of names that pops up when you type @.
1. Work a ticket
- Open Tickets. The Unassigned view lists what nobody has picked up; the badges show priority and how close each ticket is to its service-level target.
- Open a ticket and click Pick this up. It's now assigned to you and the first-reply clock is yours.
- Read the request, then type in the Reply box and click Send. The requester gets it by e-mail and can reply to that e-mail. Tick Internal note for something only staff should see.
- Use the Move to buttons as the work progresses: In progress while you're on it, Waiting on requester if you need something from them (the clock pauses), On hold for a part or a vendor.
- When it's fixed, choose Resolved and write a short resolution note. The requester is told by e-mail; if they reply, the ticket reopens, and otherwise it closes by itself after a week.
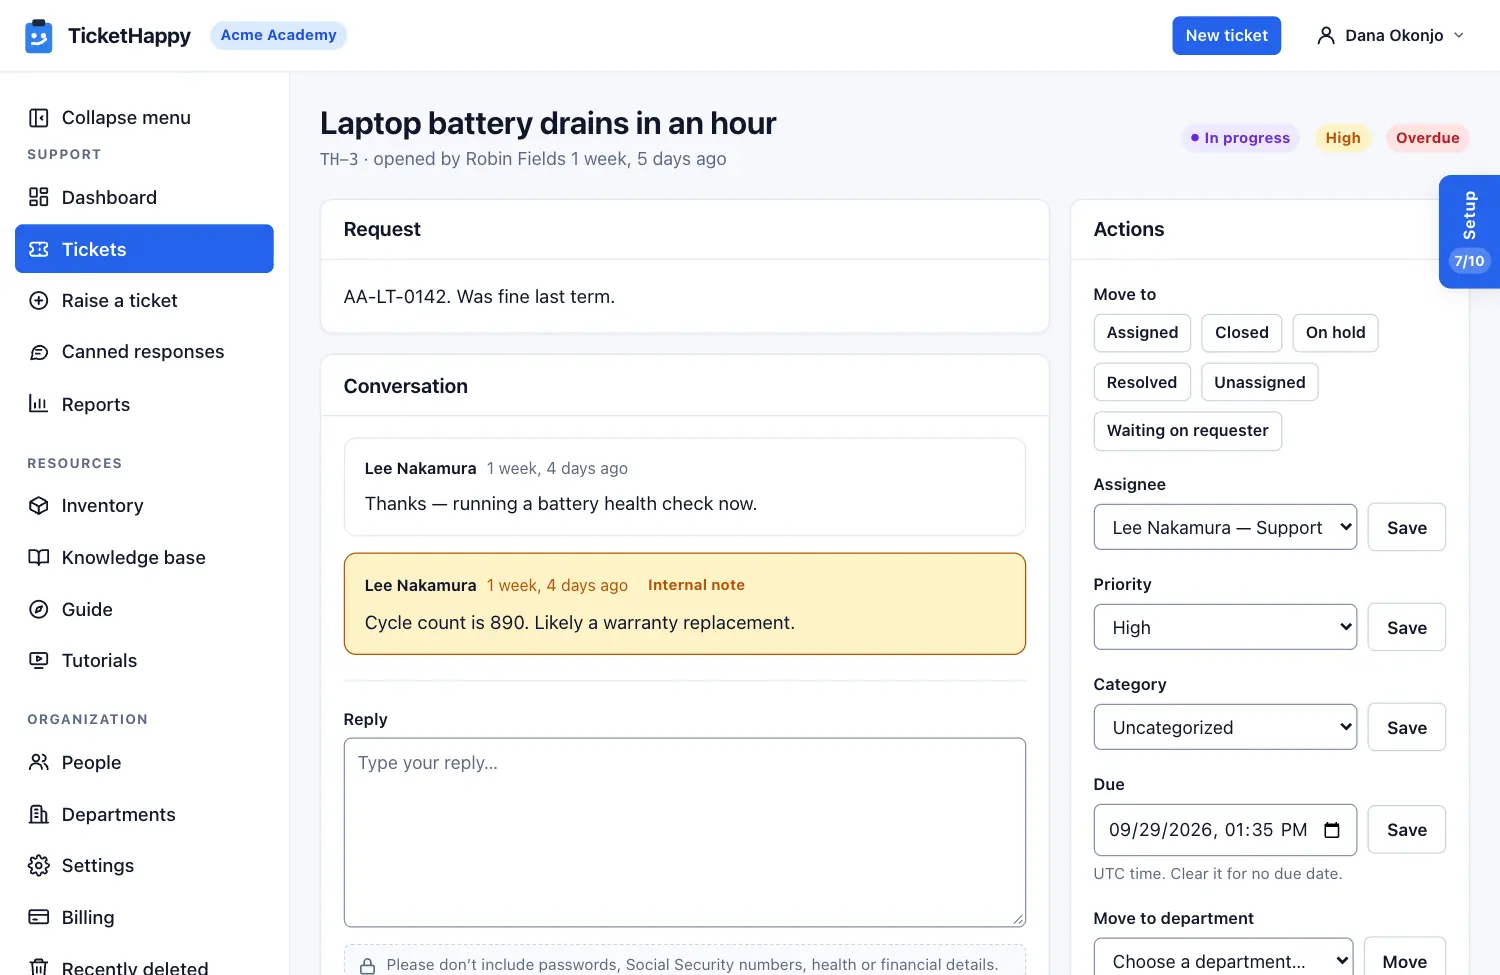
2. Save a canned response
The answers you type over and over, saved once and available under every reply box.
- Open Canned responses in the menu on the left.
- Under New canned response, give it a name and write the reply. Placeholders
fill themselves in when you use it:
{{requester_first_name}},{{ticket_key}},{{agent_first_name}}and{{organization}}; the full list is on the left of the page. - Choose who sees it under Shared with: the whole organization, one department, or untick Share it to keep it to yourself.
- Click Save response. On a ticket, open Use a canned response under the reply box, pick it, edit the text if you like, and send.
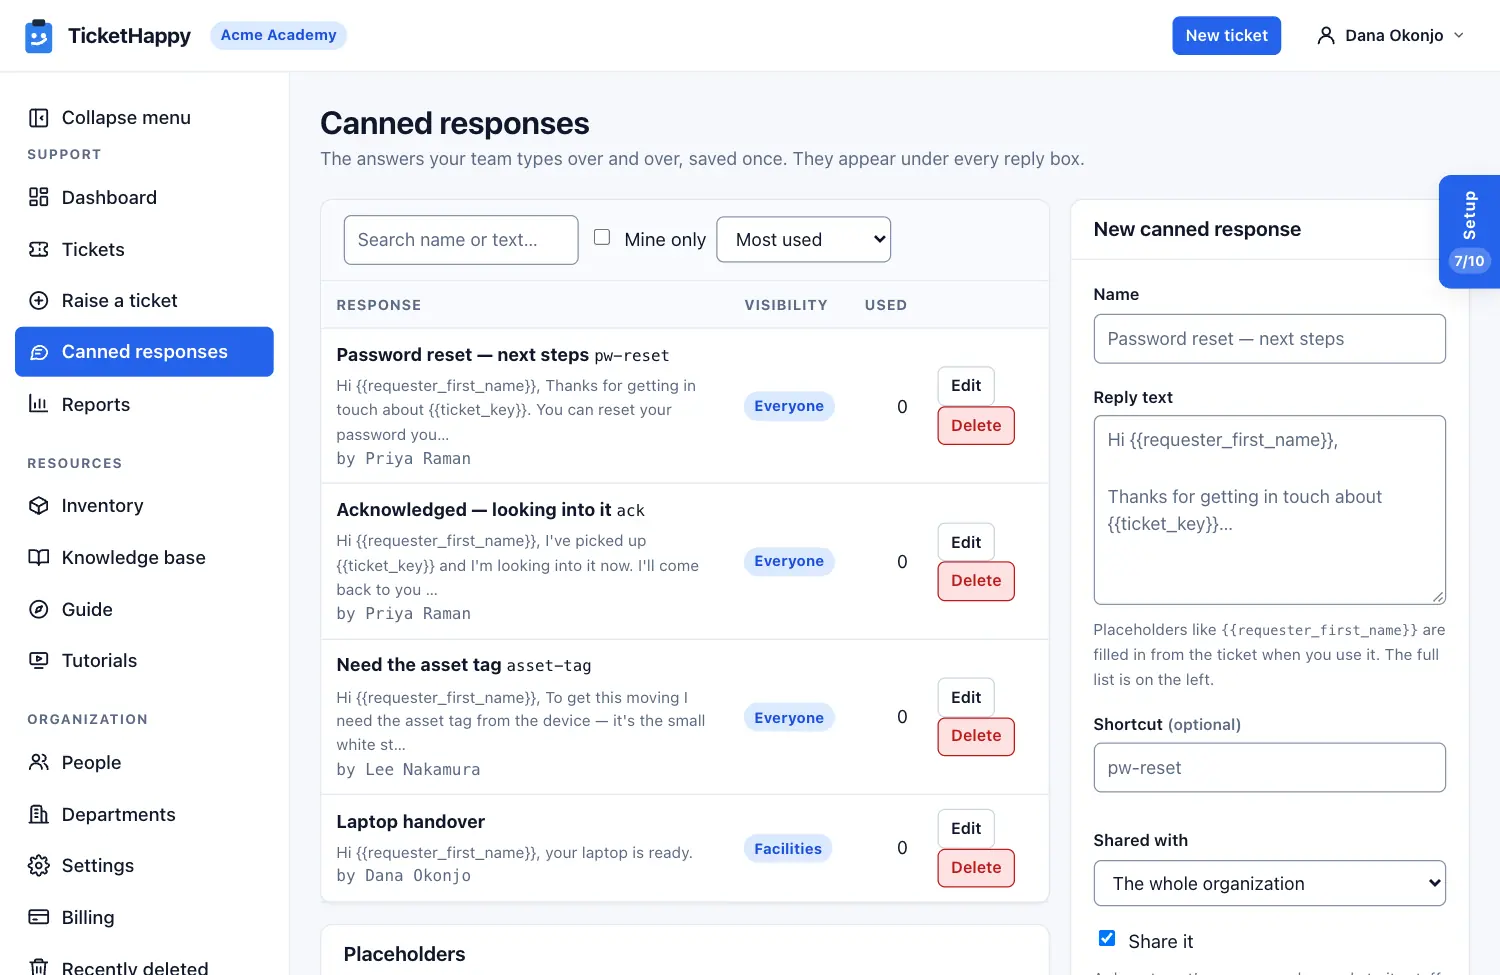
3. Write a knowledge base article
An article answers a question before it becomes a ticket, or tells your colleagues how something is done.
- Open Knowledge base and click New article.
- Write a title, a one-line summary and the body. Markdown works for headings, lists and links.
- Choose who can read it: Technicians only for runbooks, Signed-in members for everyone in your organization, Public for anyone on your public knowledge base.
- Pick a category and, if it belongs to one department, that department.
- Save it as a draft, or publish it. Published public articles appear on your public knowledge base as soon as an administrator has switched that on.
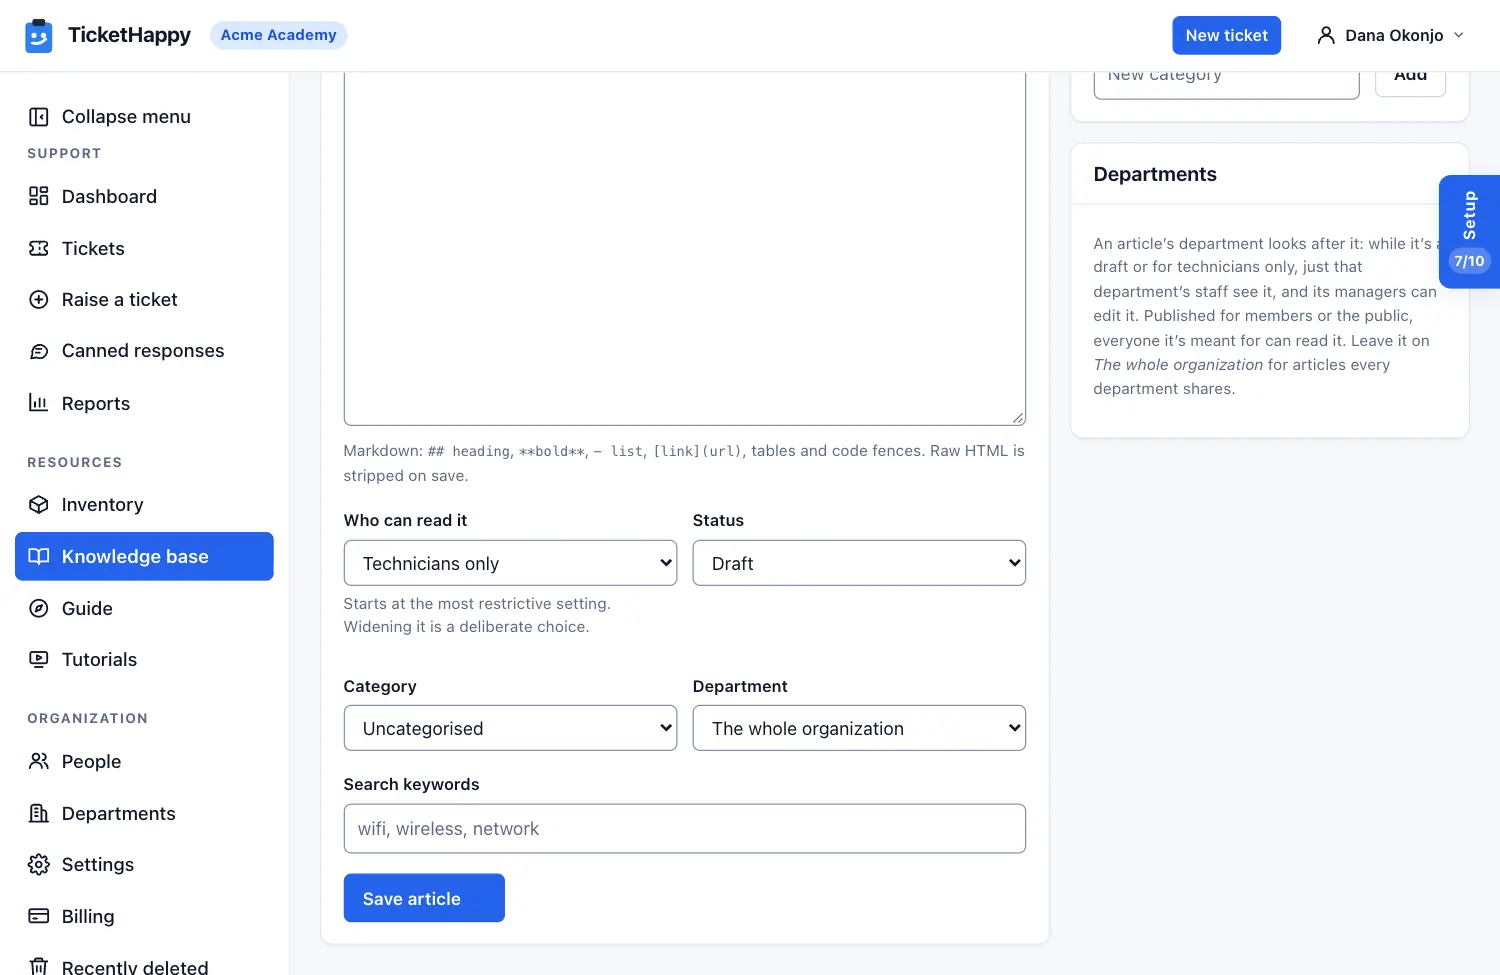
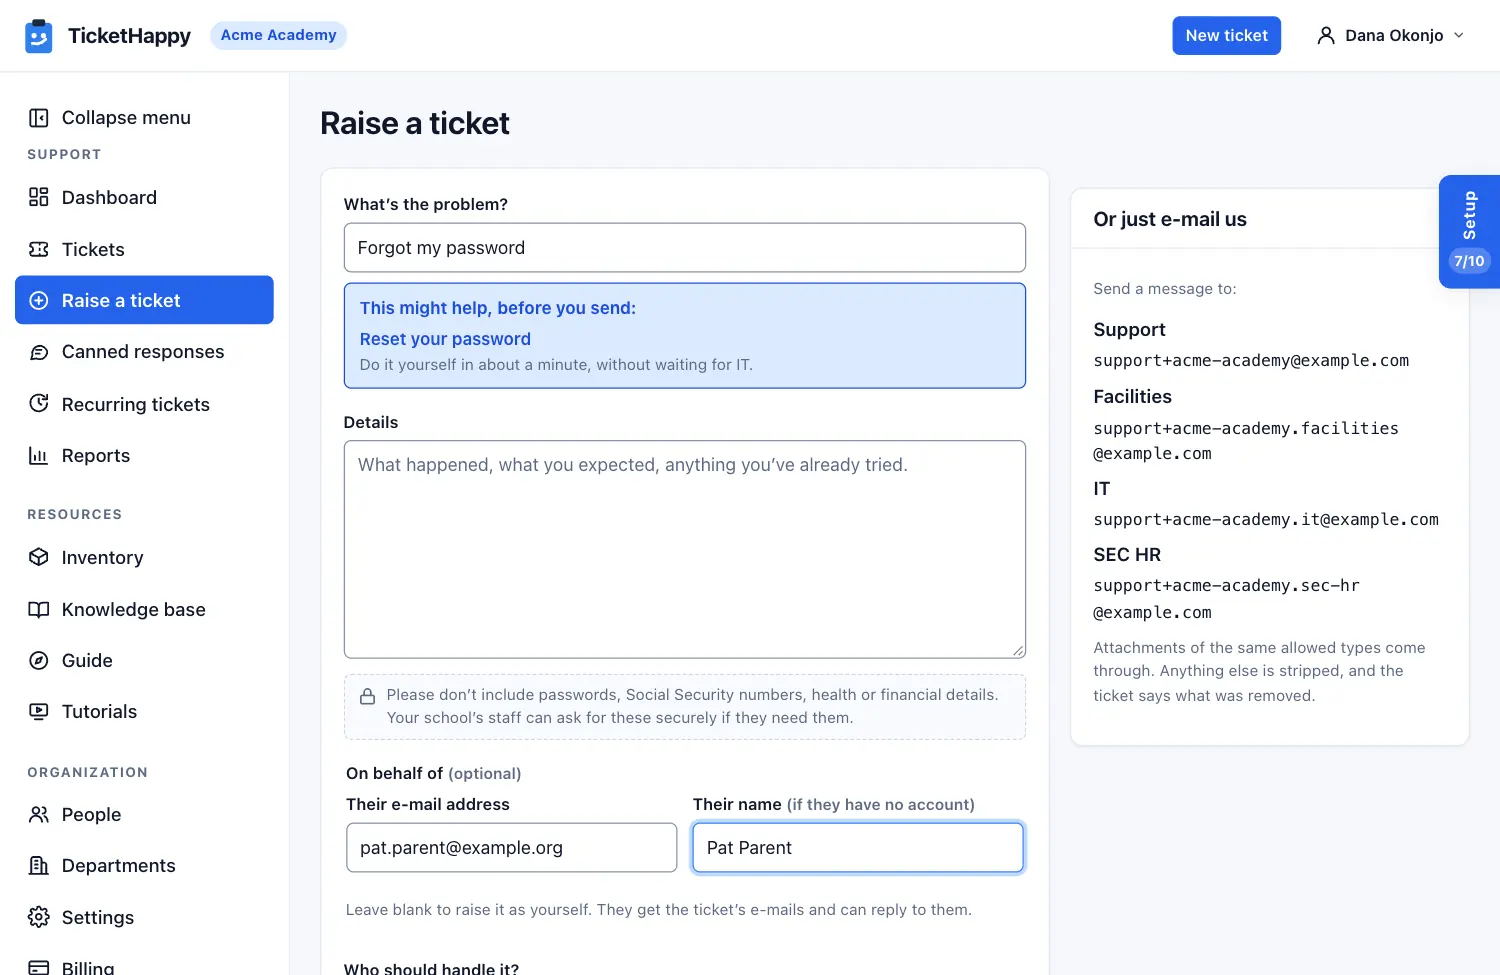
Published articles answer questions before they're asked: as someone types the subject of a new ticket, up to three articles they may read appear under it as This might help, before you send. Technician-only articles are suggested to technicians alone. The picture under the next walkthrough shows one.
4. Raise a ticket for someone else
A phone call, a walk-up at the desk, a parent who e-mailed you directly: raise the ticket for them and they get its e-mails as if they'd sent it.
- Click New ticket at the top of any page.
- Write the subject and details as usual. If an article could answer it, it's suggested under the subject.
- Under On behalf of, type their e-mail address. A member's address files it as that member; for anyone else, add their name as well, and the department has to accept e-mail from outside (its Settings say who may e-mail in).
- Choose the department and send. They get the "received" e-mail and every reply, and can answer by e-mail.
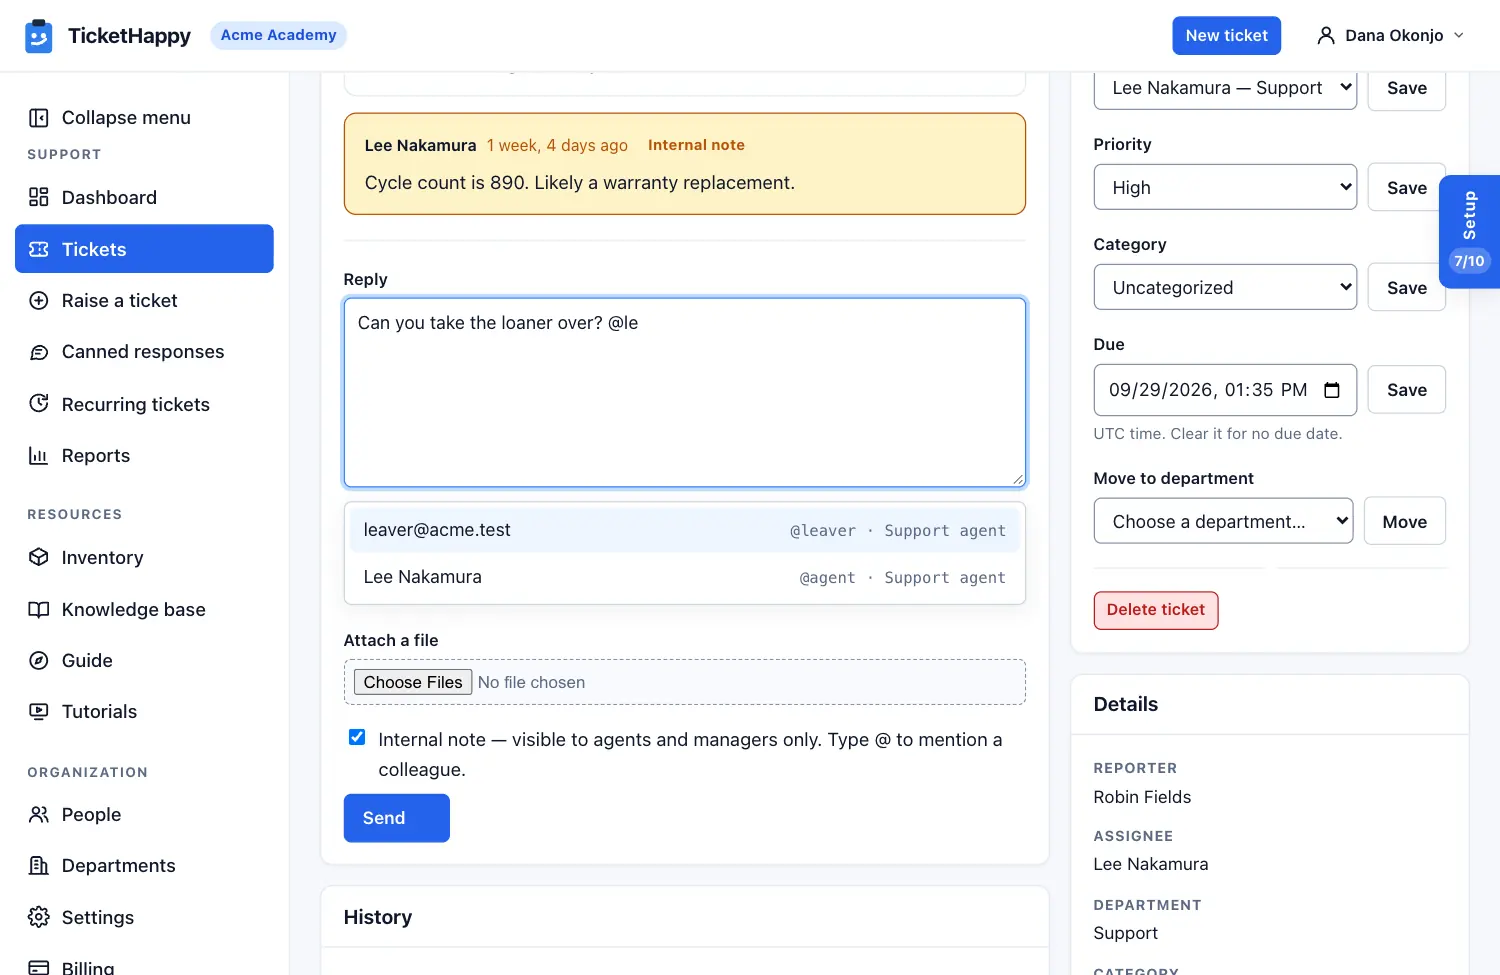
5. Mention a colleague in a note
Need a second pair of eyes? Mention a colleague in an internal note and they're e-mailed the note, whatever their e-mail settings. Only staff who can already read the ticket's notes can be mentioned, so a mention never shows a note to someone new.
- On the ticket, tick Internal note under the reply box.
- Type
@and the start of their name or address. A list of matching colleagues appears under the box; use the arrow keys and Enter, or click one. - Finish the note and click Send. They get "You were mentioned" by e-mail with the note and a link to the ticket; the requester sees nothing.
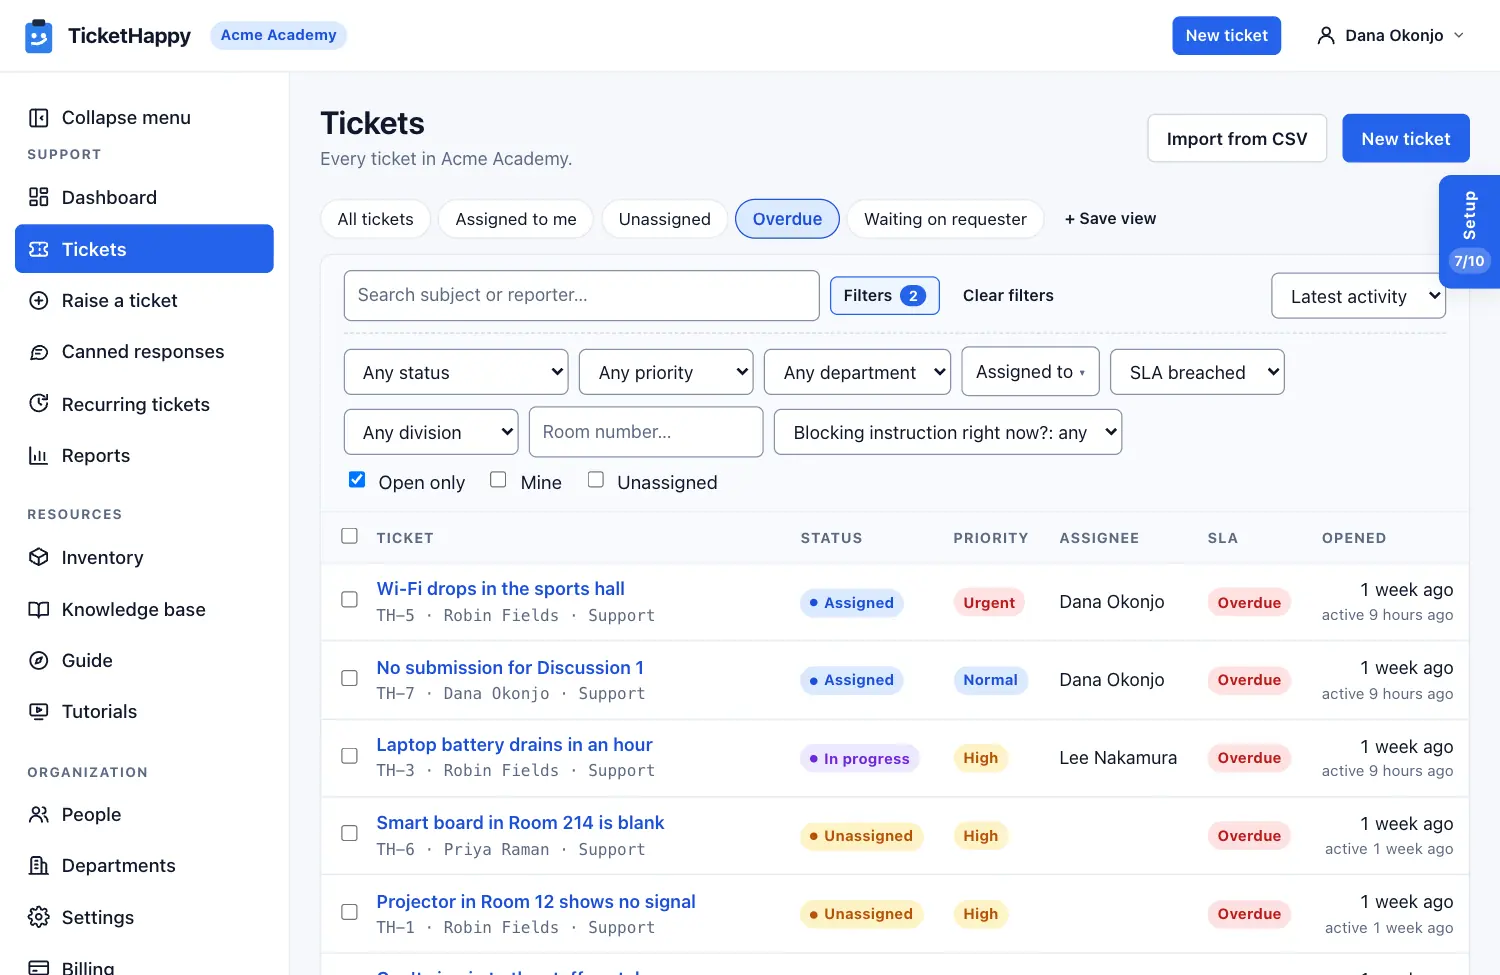
6. Find what's overdue or waiting
Two views above the ticket list answer the morning's questions. Overdue is every open ticket past a service-level target; Waiting on requester is every ticket waiting for an answer from the person who raised it, where the clock is paused.
- Open Tickets and click Overdue. The SLA column says whether the reply or the fix is late; the oldest activity is usually the place to start.
- Tick a few, and the bar that appears lets you assign or move them together.
- Click Waiting on requester for tickets to chase. A reply from the requester brings a ticket back to Assigned on its own.
- Want a different cut, such as overdue in one department? Set the filters and click Save view; it's added beside the built-in ones.